CASHBOX CB09 · How it works

From placing an order to collecting it.

See how Cashbox connects orders from staff, kiosks or tables with independent cash payment and receipt collection, and explore placement in your venue.

FROM ORDER TO RECEIPT

Three journeys.
One Automatic Cashier.

Order with a staff member

A staff member enters the order. The ordering software sends the payment request to boxcontrol, and the customer pays and collects the receipt at Cashbox.

Ordering software → boxcontrol

  1. 1
    Order with staff

    The customer places an order with a staff member.

  2. 2
    Request to boxcontrol

    The ordering software sends the payment request to boxcontrol.

  3. 3
    Pay at Cashbox

    The customer pays cash at Cashbox.

  4. 4
    Payment completion

    After payment completes, Cashbox returns any change due and prints the retail receipt.

  5. 5
    Collect receipt

    The customer collects the receipt from the same machine.
Order at a kiosk

The customer orders at the kiosk and can pay by card at its POS terminal. If they choose cash, they scan the barcode at Cashbox, pay with coins or banknotes and collect their receipt there. No visit to the staffed checkout or assistance from a cashier is needed.

Connected with KioskPOS ↗
  1. 1
    Order & barcode at the kiosk

    The customer orders at a KioskPOS kiosk, chooses cash and receives the order barcode.

  2. 2
    Scan at Cashbox

    The customer scans the barcode at Cashbox. The order is identified and the amount due is displayed.

  3. 3
    Coins or banknotes

    The customer pays with coins or banknotes, following the on-screen instructions.

  4. 4
    Receipt from Cashbox

    After payment, the customer collects any change and the retail receipt from Cashbox without needing a cashier.

  5. 5
    Forward the paid order

    Once the transaction completes successfully, the paid order is sent to the supported ordering system for preparation.

Order from the table

The customer orders on their phone through TableManager. If they choose cash, they scan the barcode at Cashbox, pay with coins or banknotes and collect their receipt. The entire checkout is completed without a stop at the cashier or staff assistance.

Connected with TableManager ↗
  1. 1
    Order & barcode on the phone

    The customer orders through TableManager, chooses cash and displays the order barcode on their phone.

  2. 2
    Scan at Cashbox

    The customer scans the code from their phone at Cashbox to identify the order and the amount due.

  3. 3
    Coins or banknotes

    The customer pays with coins or banknotes at the Automatic Cashier.

  4. 4
    Receipt from Cashbox

    After payment, the customer collects any change and the retail receipt from Cashbox without needing a cashier.

  5. 5
    Forward the paid order

    Once the transaction completes successfully, the paid order is sent to the supported ordering system for preparation.

From kiosk or phone ordering to payment and receipt: customers complete the process independently, even with cash, without a stop at the cashier.

IN YOUR VENUE

One Cashbox serves
multiple kiosks.

Cashbox brings together cash payment and receipt printing for orders from multiple kiosks. The number and position of units are tailored to the flow of the venue.

PAYING BY CARD

At the kiosk’s POS terminal.

The customer places an order, pays by card and collects their receipt at the same kiosk, without needing a cashier.

PAYING WITH CASH

At the shared Cashbox.

The customer receives the order barcode, scans it at Cashbox and pays with cash. They collect any change and the retail receipt from the same machine, without staff assistance.

How many Cashbox units does your venue need?

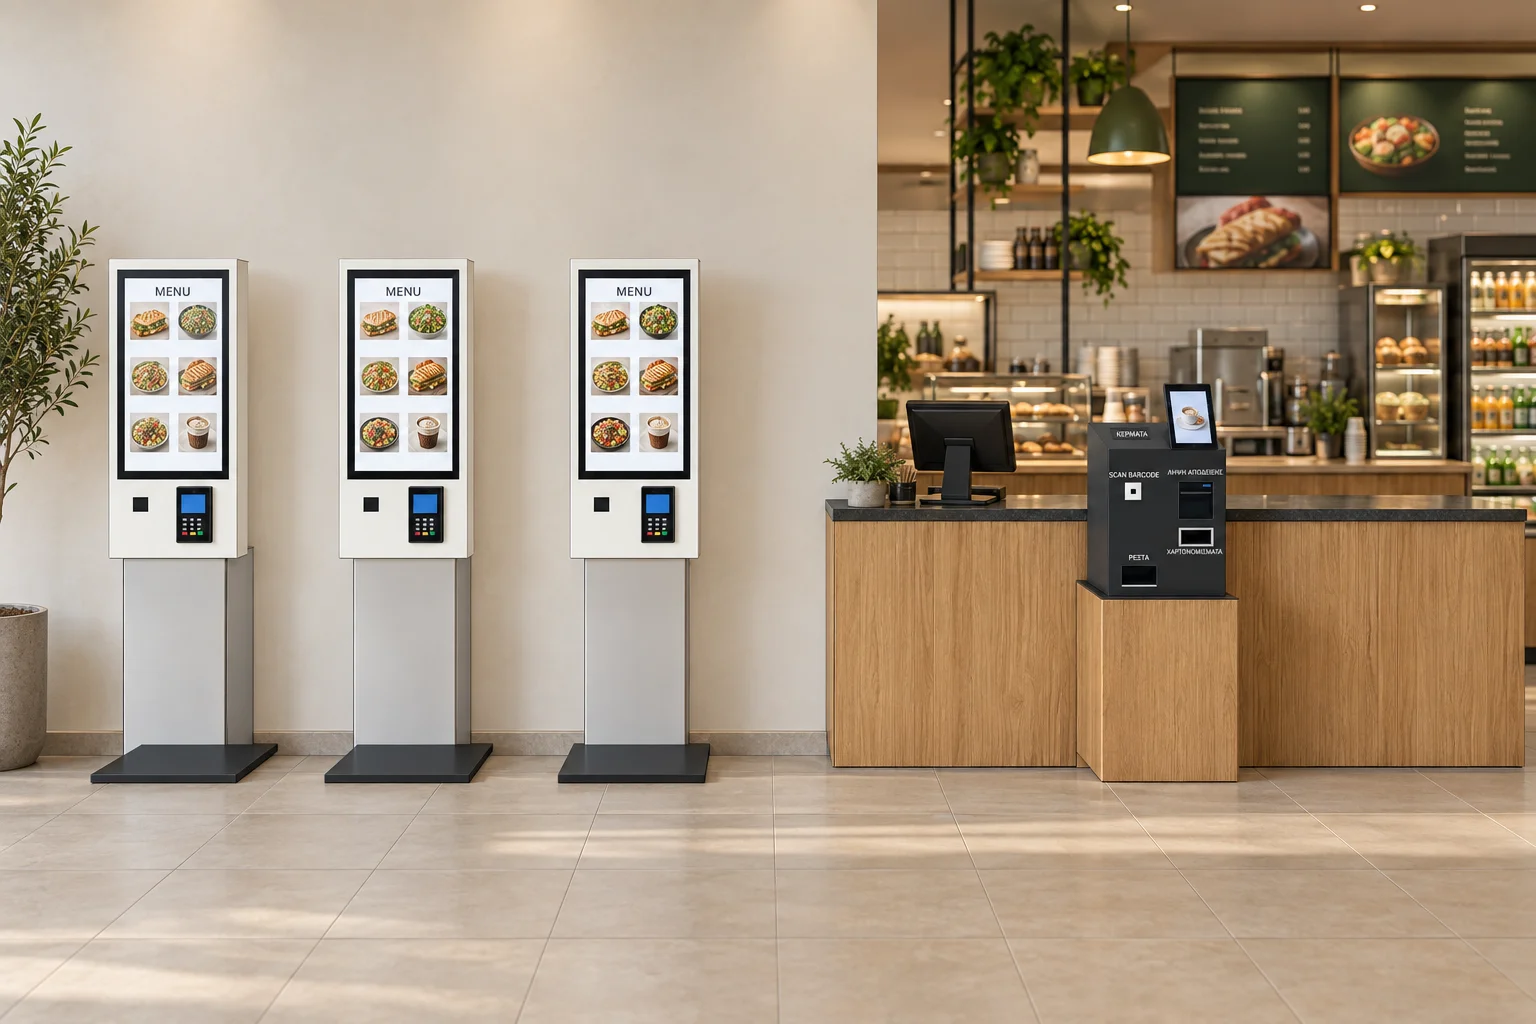
The number depends on peak-time demand, the share of cash payments and the venue layout. Examples with 3 kiosks and 1 Cashbox or 4 kiosks and 2 Cashbox show possible layouts; the right ratio is tailored to your business.

One Cashbox at the counter serves staff-entered orders. A second unit near the kiosks serves customers completing payment independently.

Every customer has their own path.

One Cashbox at the counter serves staff-entered orders. A second unit near the kiosks serves customers completing payment independently.

The machines fit into open counter recesses. The entire front stays accessible, from scanning to collecting receipts and change.

Two Automatic Cashiers. One continuous counter.

The machines fit into open counter recesses. The entire front stays accessible, from scanning to collecting receipts and change.

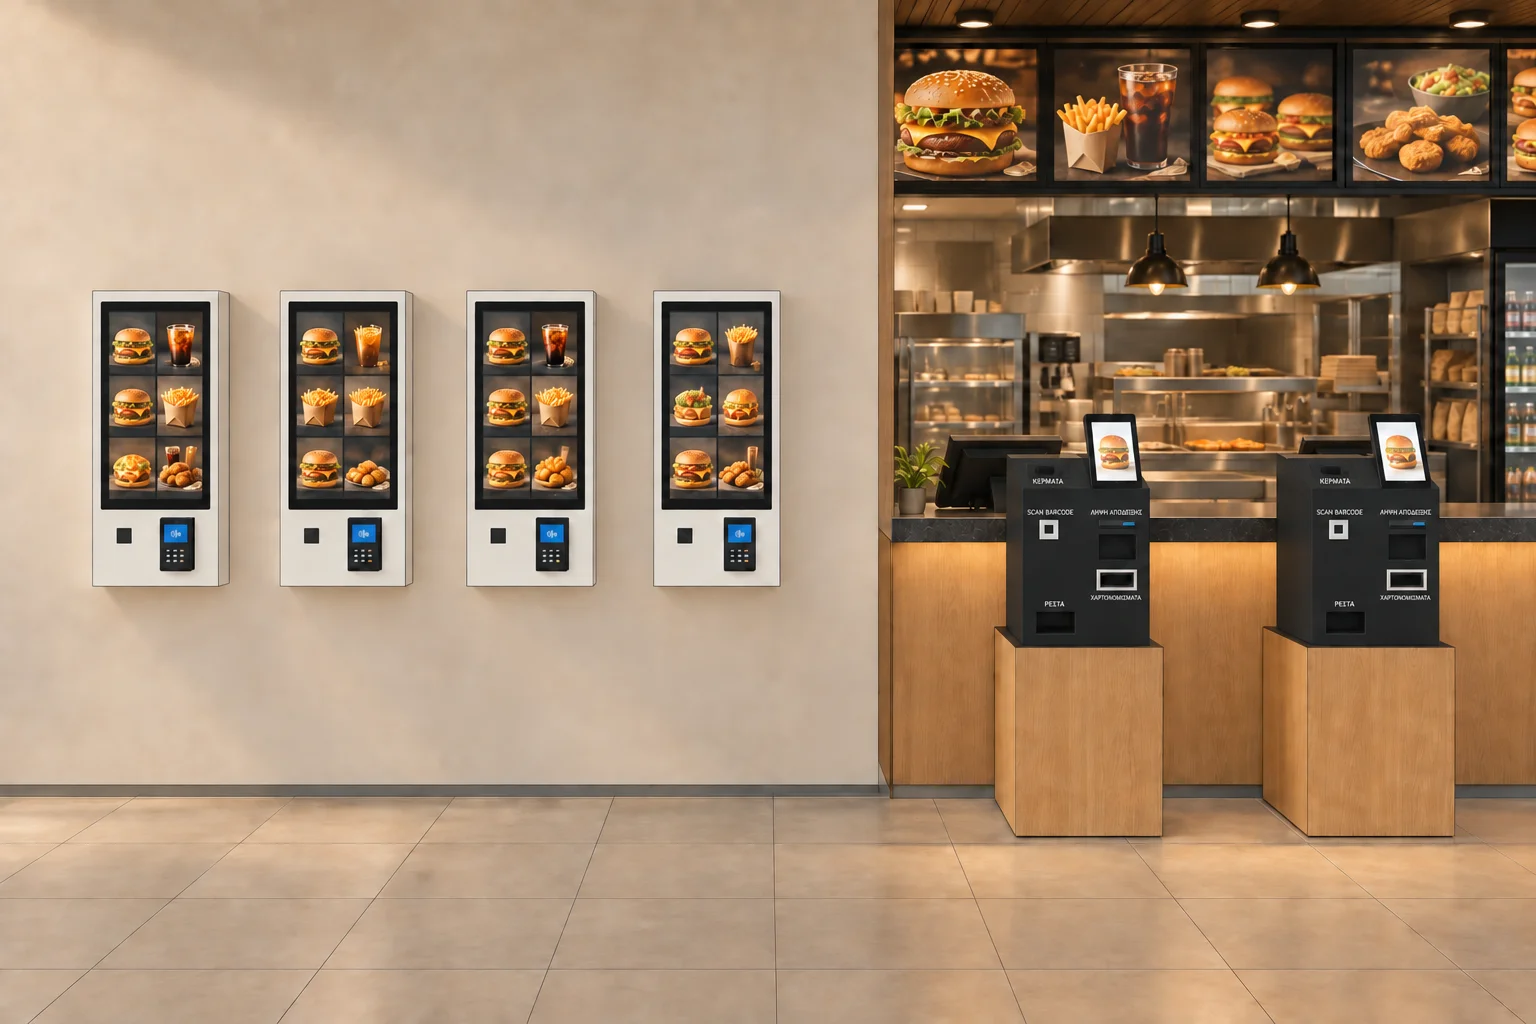
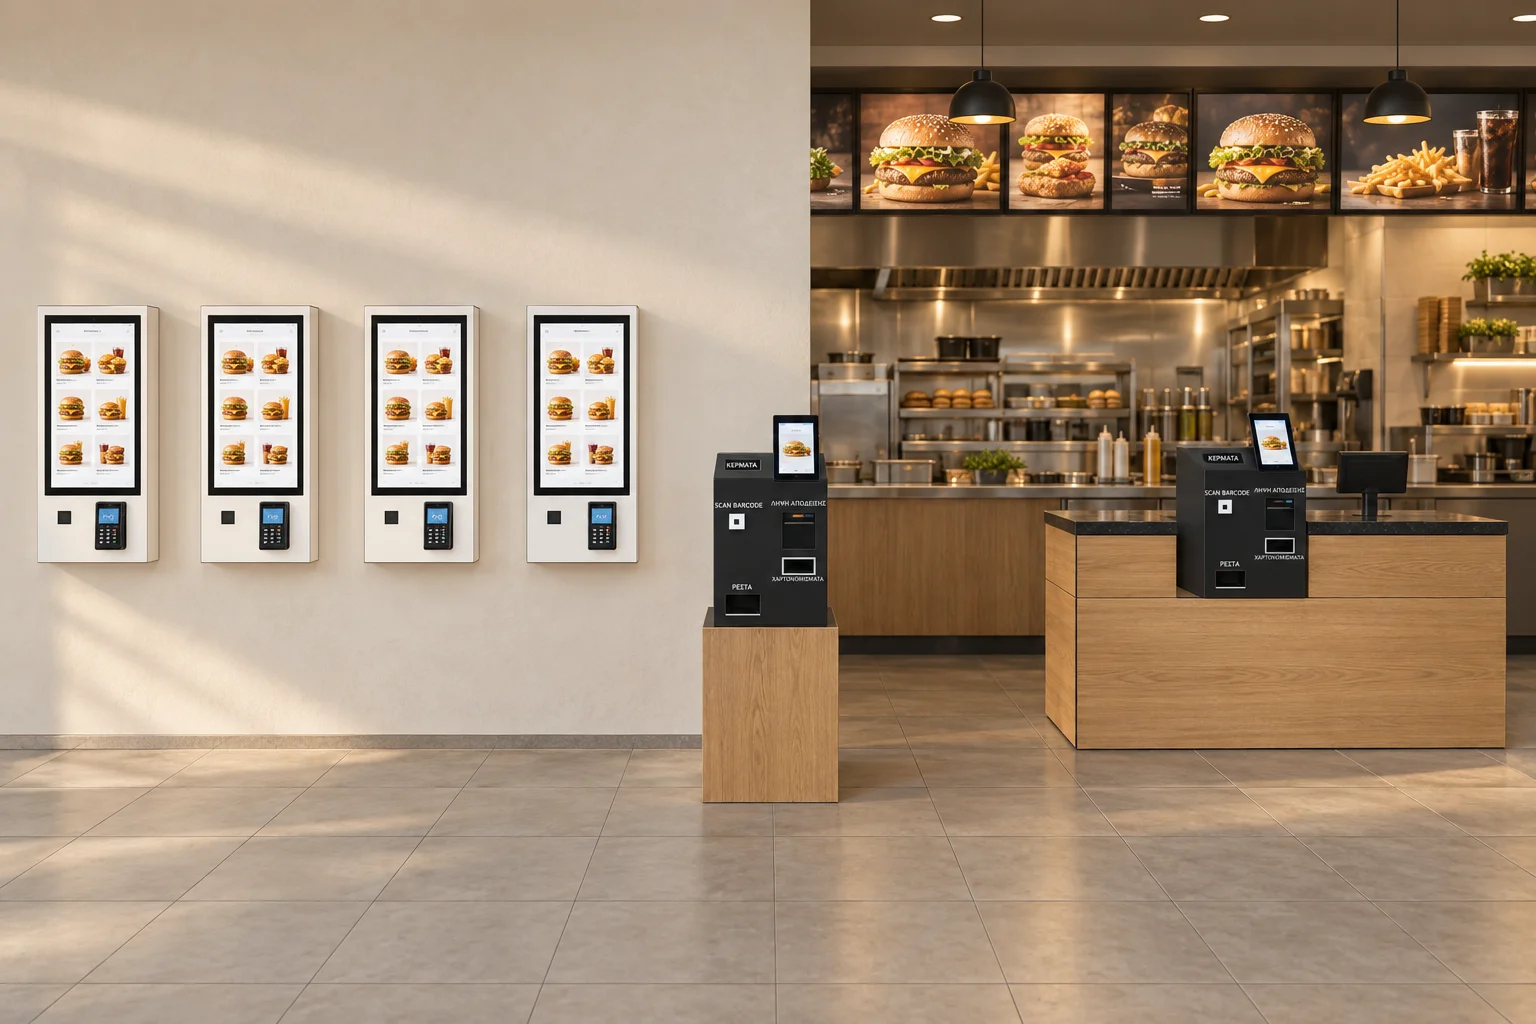
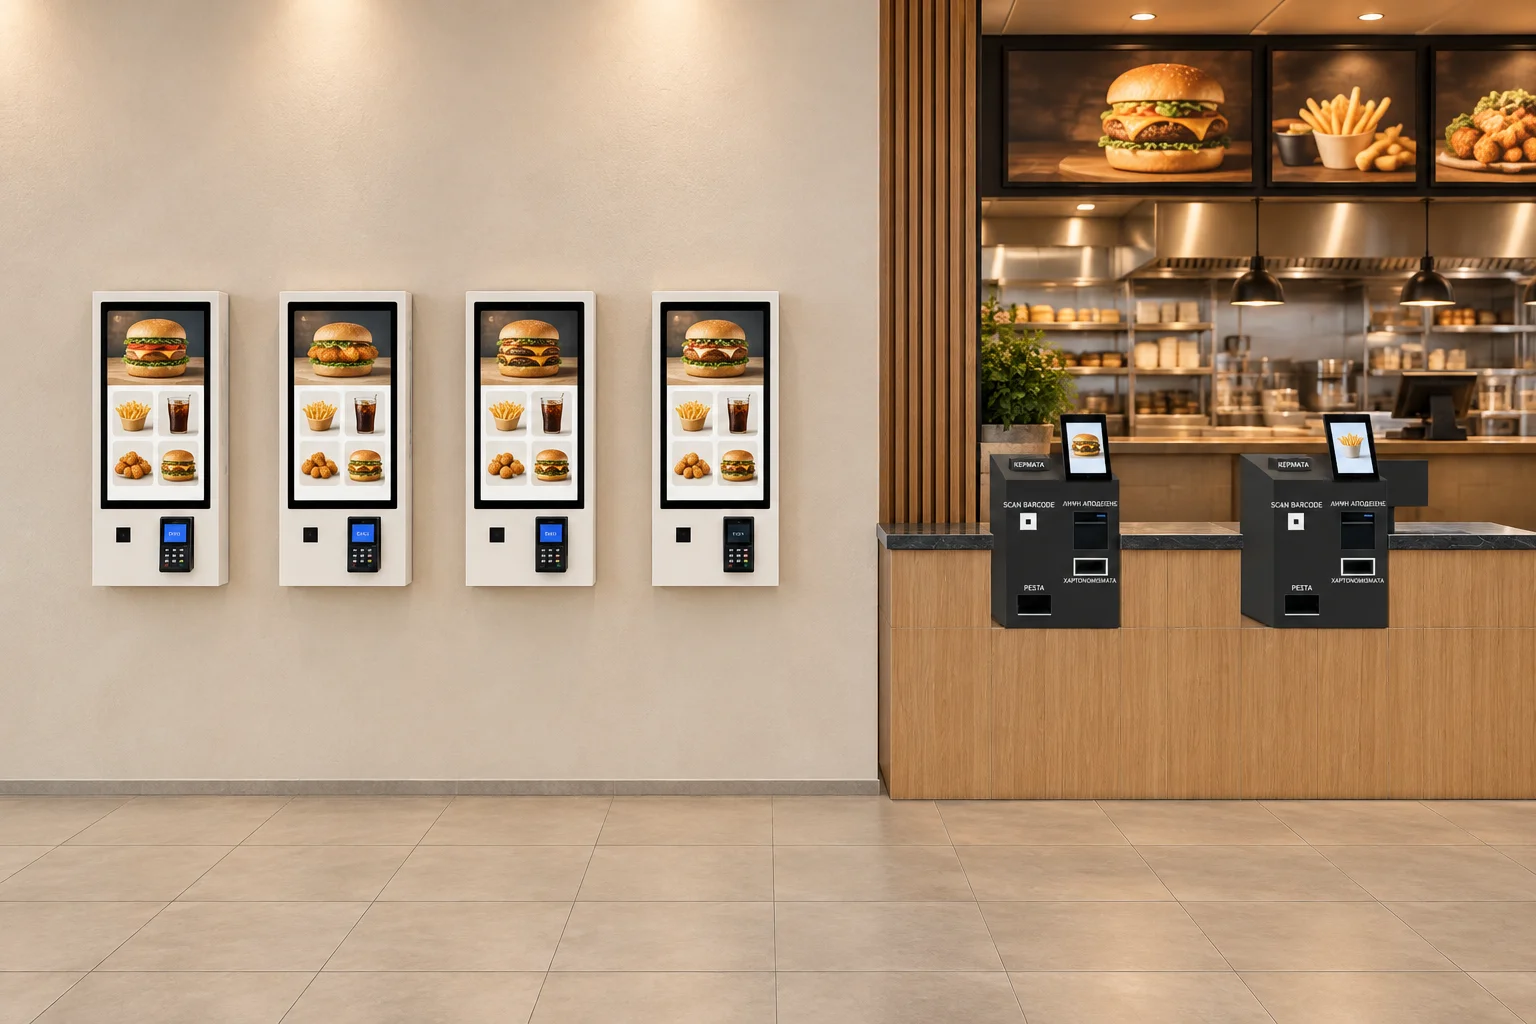
Two units on square supports in front of the counter. Four wall-mounted ordering kiosks sit farther left, each with its own card terminal.

In front of checkout, with a clear approach.

Two units on square supports in front of the counter. Four wall-mounted ordering kiosks sit farther left, each with its own card terminal.

Illustrative placement proposals. The number and position of units are adapted to the venue’s flow. Every kiosk shown has a POS terminal for card payment.

Three ordering kiosks with card POS share one Cashbox

ONE SHARED POINT

The order starts at the kiosk. Cash payment completes here.

The customer receives their order code, heads to Cashbox and continues independently until collecting their receipt from the Automatic Cashier.

The 3:1 layout is an example.

ORDER STATUS DISPLAY

From payment to pickup.

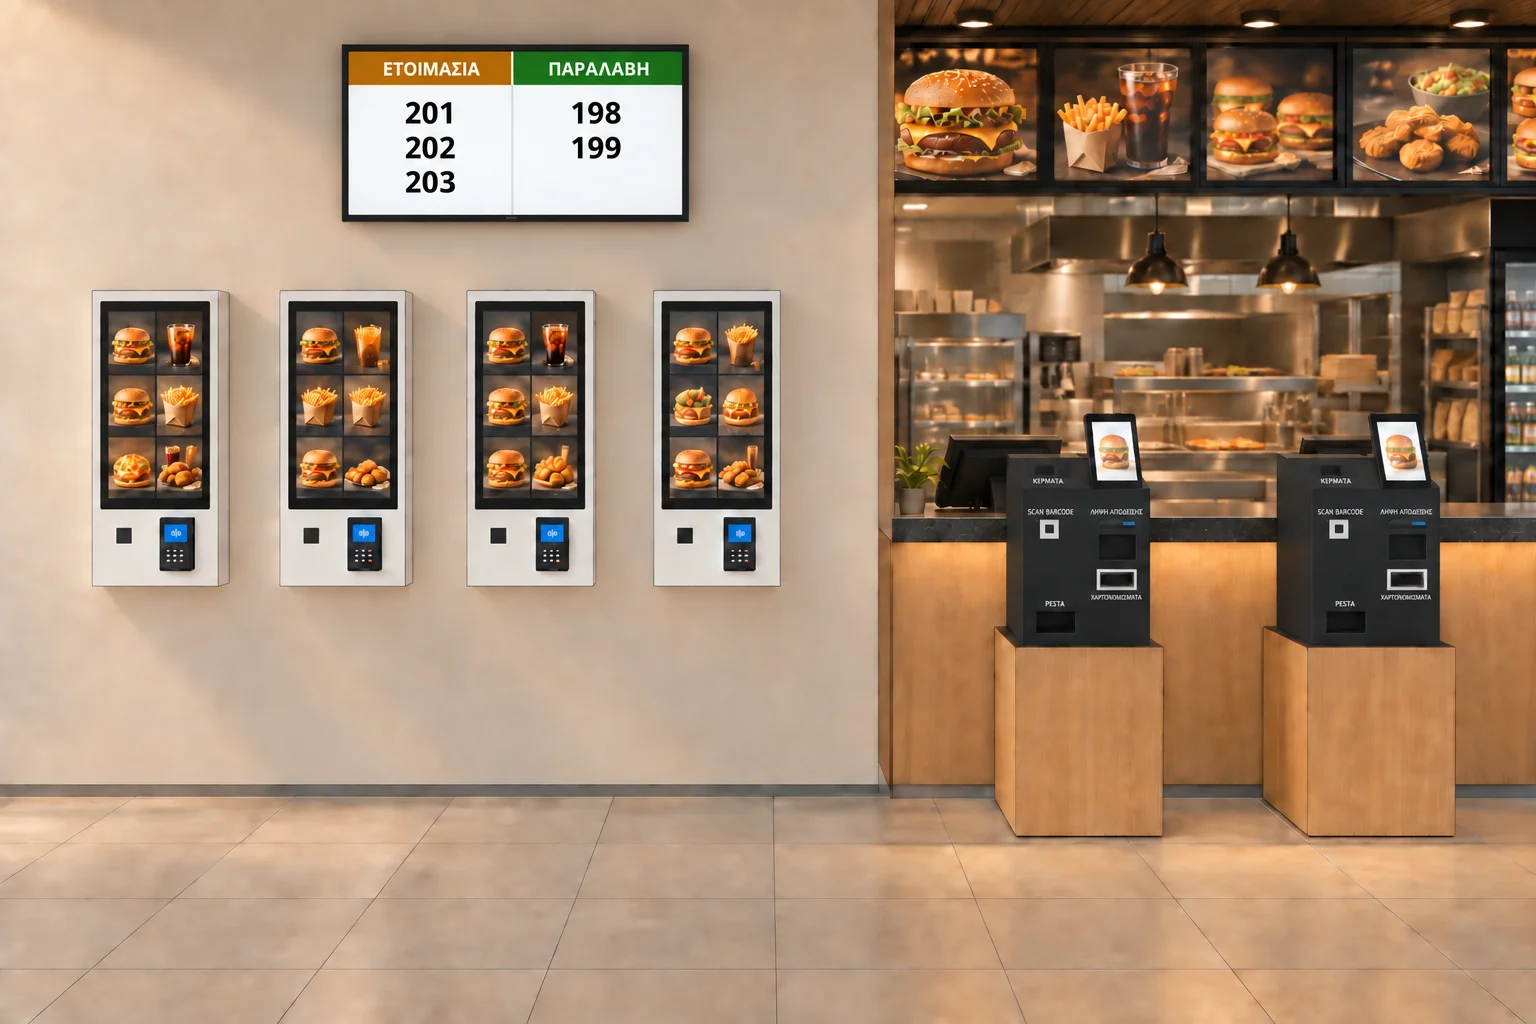
After paying and collecting the receipt, the customer follows their order number on the order status display. They can see which orders are being prepared and which are ready to collect.

Burger house with four kiosks with card terminals, two Cashbox units and a display of order numbers being prepared or ready for collection
  1. Payment and receipt

    The customer completes cash payment at Cashbox and collects the receipt from the same machine.
  2. The order is being prepared

    The paid order is forwarded to the supported ordering system. While being prepared, its number appears in the Preparing column and the customer can wait and follow the display.

  3. Ready to collect

    When the order is ready, its number appears in the Ready to collect column and the customer goes to the collection point.

YOUR ORDER

PREPARING

  • 201
  • 202
  • 203

READY TO COLLECT

  • 198
  • 199

Example order numbers.

The order status display works with the ordering software to show the status of each order.